In this article, we will look at how we can setup a Spatial database in PostgreSQL using the PostGIS extension and how we can connect it to QGIS, a free and Open Source Geographic Information System.
1. Setup PostgreSQL and PostGIS
The first thing we need to do is install the PostgreSQL database server on our local machine. For this demo, we are using a Linux system and the steps followed are for Ubuntu 18.04. If you have a different operating system follow instructions on how to install PostgreSQL on the Official Downloads Page.
- Use the standard APT package manager to install PostgreSQL on the terminal
$ sudo apt-get install postgresql postgresql-contrib pgadmin
- Add
PostGISextension to PostgreSQL server
$ sudo apt-get install postgis
- If the previous steps went well, you should now have postgreSQL installed along with pgAdmin, an Open Source administration and development platform for PostgreSQL. Use pgAdmin to create a new user for our database.
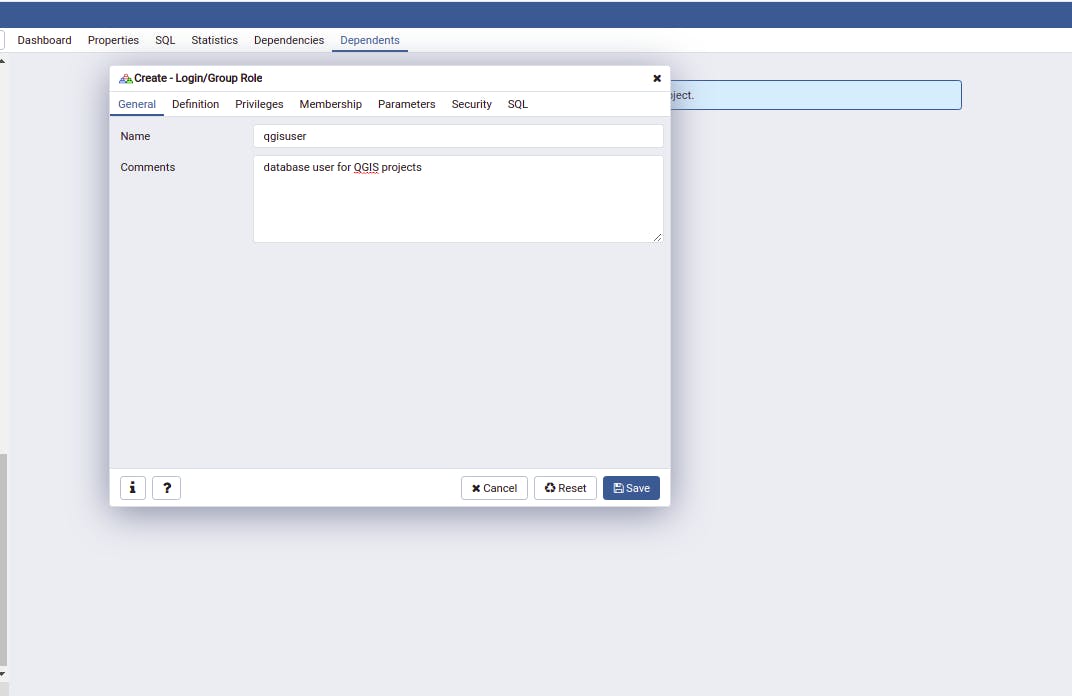
- Lets now create our database. We will name it
addis_ababa. We will use this database to store spatial information about the city of Addis Ababa. After creating the database add thePostGISextension, which adds support for geographic objects allowing location queries to be run in SQL.
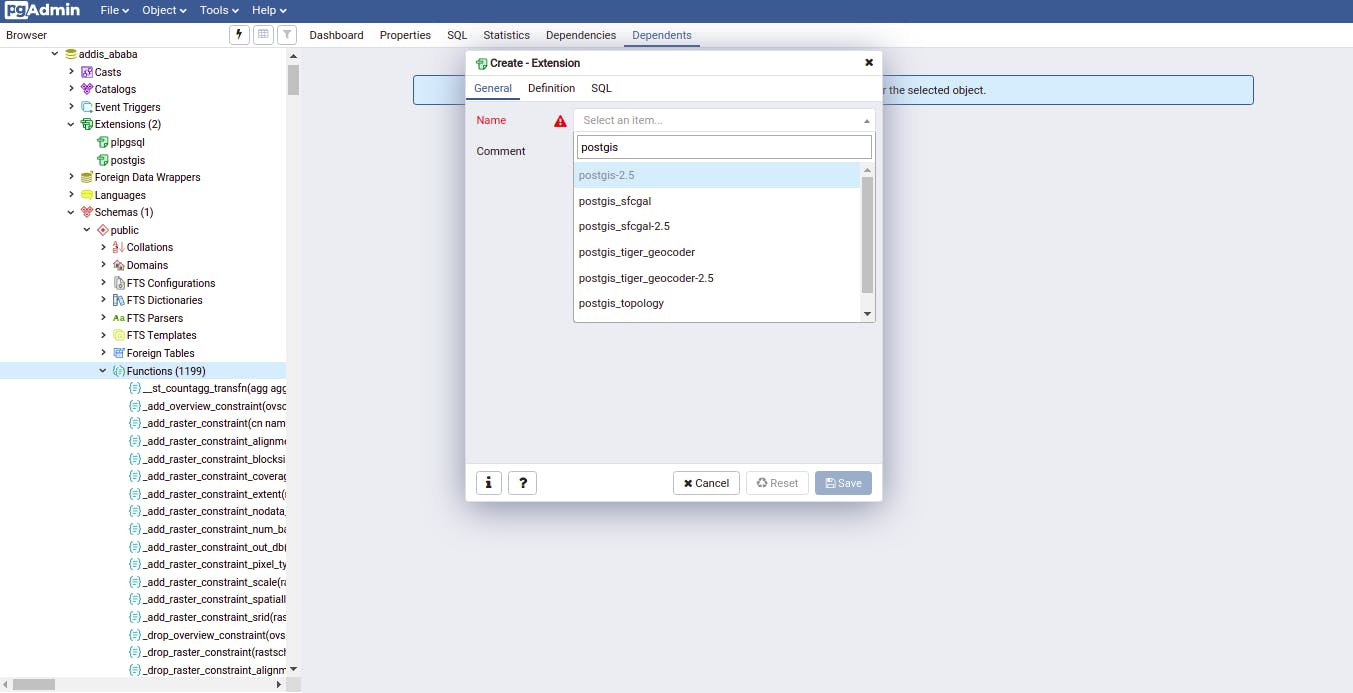
2. Query OpenStreetMap data using the QuickOSM plugin on QGIS
Now that we have successfully setup our database, the next step is to get some spatial data. We will get data from OpenStreetMap using the Overpass API. To make our job easy, we will use the QuickOSM plugin.
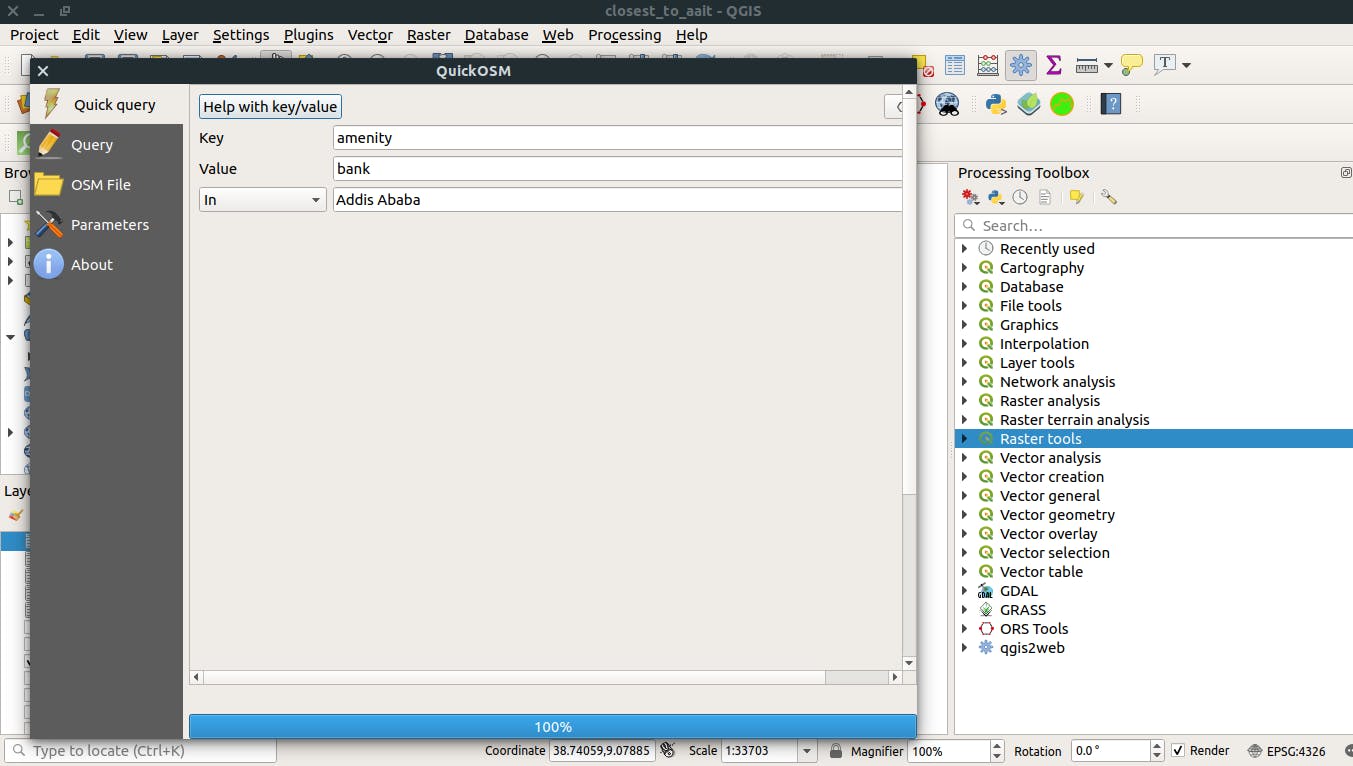
We first need to install the plugin using the Plugin manager. Then we can run our queries using the Quick query option. The queries follow the Overpass API query syntax.
The image below shows one of the queries we run to get data about banks from OpenStreetMaps
We repeat this process for all of the facilities we want to include in our database.
3. Add Spatial Data to our Database using DB Manager
We then import the vector layers to our PostGIS database using the DB Manager. But before we can do that, we need to connect our local PostgreSQL server to QGIS.
Go to the Browser panel and right-click on PostGIS then New Connection... Next, configure all the required settings.
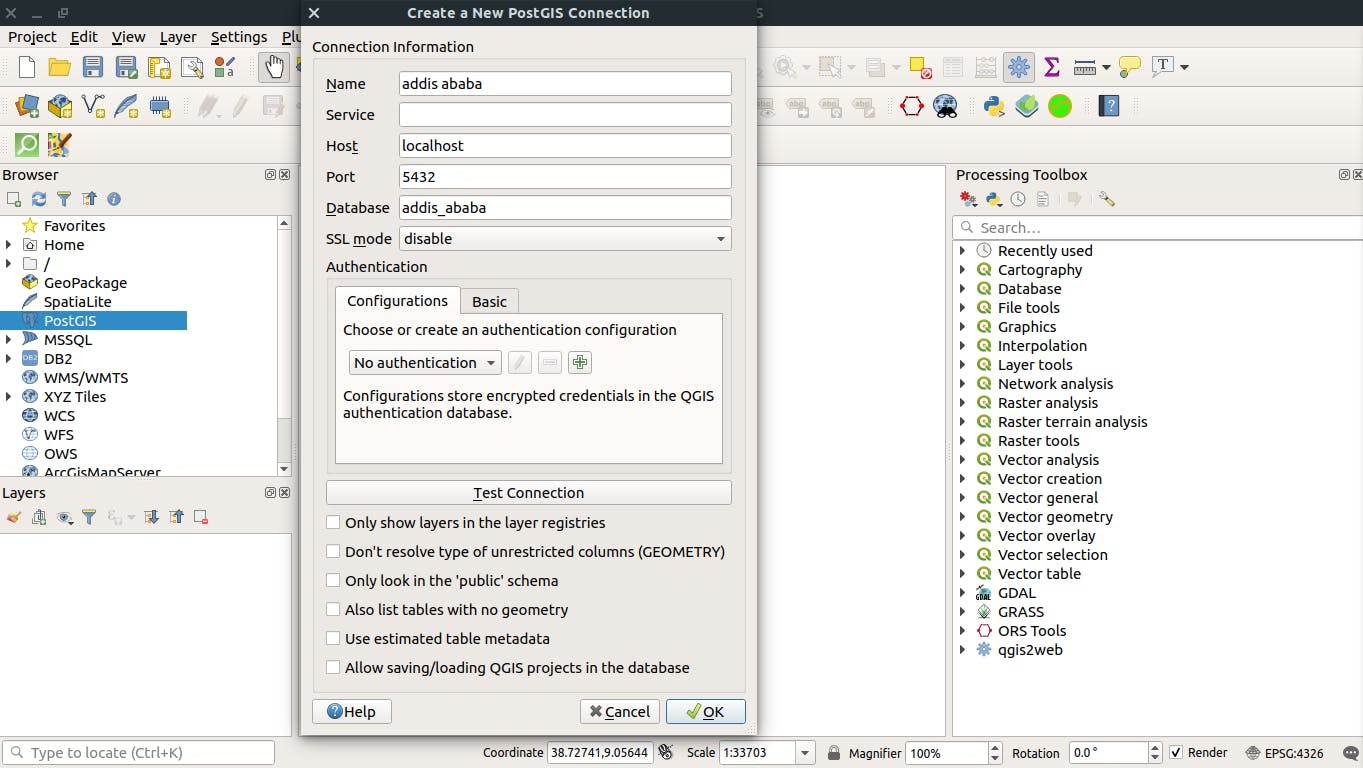
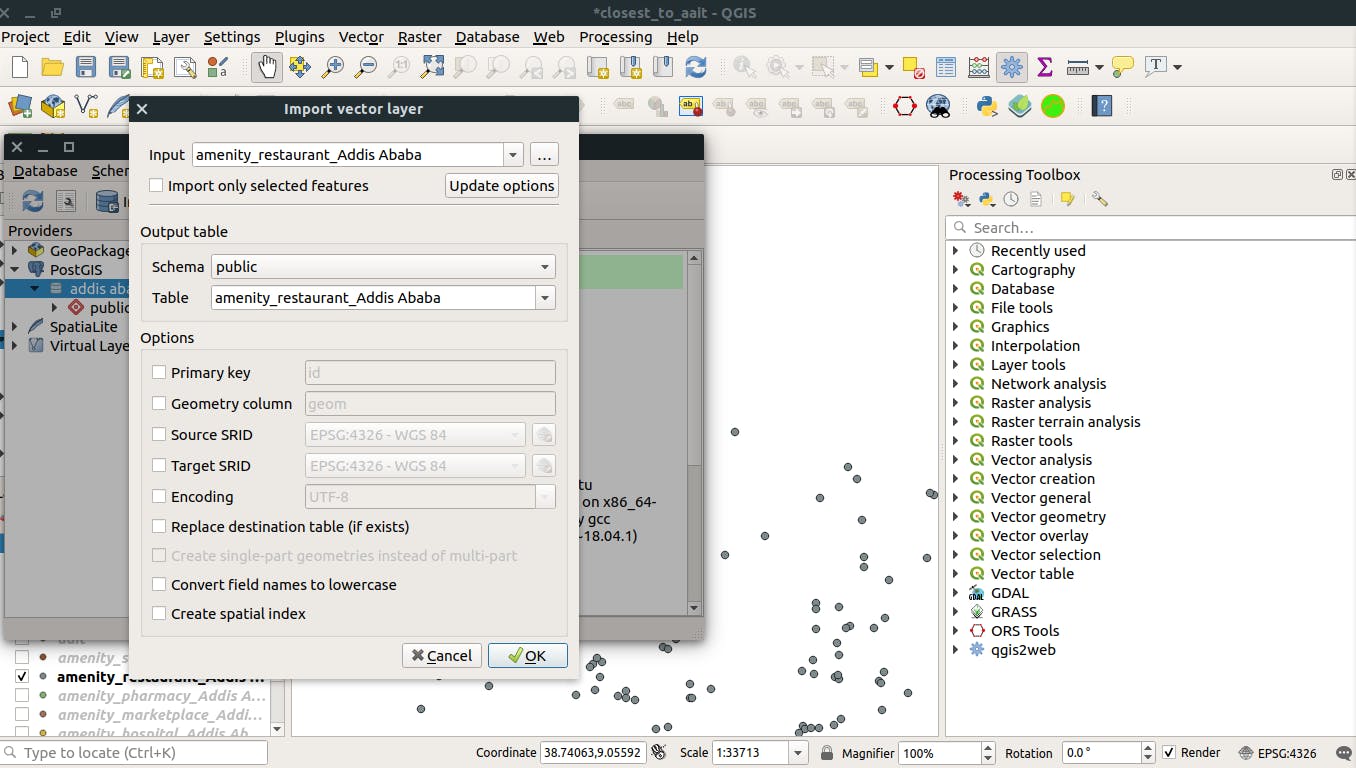
We should now have a connection established with our database server. After that we can import layers one by one to the database using the DB Manager. We use the import Vector layer option to add it to the database.
Done!
At the end we should make sure everything works as expected. Go to pgAdmin and check if the tables are added or see if the tables appear in QGIS browser Panel under PostGIS.
That's all for this article, please share your suggestions in the comment section.

